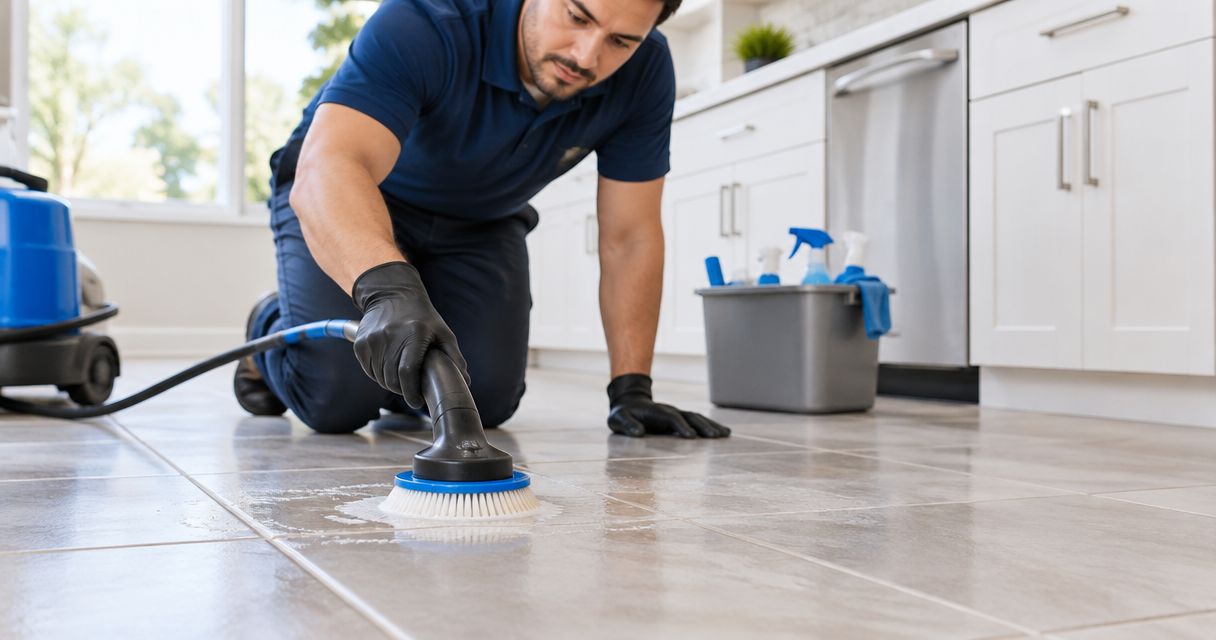

Instead of mopping construction dust into your new grout, handle tile and grout cleaning after kitchen remodel work in this order: finish dusty work, confirm the installation is ready, remove loose debris, then clean and inspect before move-in. This 2026 workflow separates routine cleanup from grout haze removal and installation repairs, so you do not treat every mark with the same cleaner.
- Tile and grout cleaning after kitchen remodel work starts with dust removal, not wet mopping.
- PowerPro Carpet Cleaning provides tile/grout cleaning for homeowners and businesses in Manalapan Township and surrounding New Jersey counties.
- Follow the grout manufacturer's curing instructions before cleaning or sealing new grout.
- Leave hardened grout haze, loose tiles, and damaged joints outside your routine cleaning checklist.
Why this matters
A kitchen remodel leaves different kinds of residue. Loose construction dust sits on surfaces. Grout haze bonds to tile. Adhesive, paint, and caulk need separate handling. A wet mop does not solve all of them.
Cleaning too early also creates rework. Cabinet adjustments, backsplash cutting, and trim installation can dirty a floor you have already cleaned. Put final floor cleaning after those jobs, rather than between them.
PowerPro Carpet Cleaning's tile/grout cleaning service is best for local homeowners and businesses seeking professional cleaning rather than installation repair. The family-owned business serves Manalapan Township and surrounding Central and North New Jersey counties. Use the PowerPro Carpet Cleaning website to find contact details and discuss your kitchen's surfaces before arranging service.
For your 2026 project, keep cleaning and contractor sign-off separate. A cleaner handles soil and suitable residue; the installer remains the person to ask about installation defects, grout specifications, and curing requirements.
Before you start
- Collect the installation details. You need the tile material, grout product, installation date, and manufacturer instructions. Include any existing sealer or surface treatment. If you do not have those details, ask the installer before choosing chemicals.
- Prepare access and materials. Clear movable items, arrange access to water where needed, and gather suitable dust-removal equipment, clean cloths, a compatible cleaner, and rinse materials. Tell a cleaning provider about unfinished work, adjacent wood floors, and areas that must stay dry.
- Check the hidden timing problem. Grout that looks dry is not automatically ready for washing, intensive cleaning, or sealing. Follow the actual product instructions. Also confirm that contractors have finished cutting and sanding before final cleaning begins.
Do not assume that porcelain tile, natural stone, cement grout, and epoxy grout share one cleaning procedure. Identify the surface before treating it. Acidic haze removers are particularly unsuitable for acid-sensitive stone, including marble and limestone.
Use a simple 2026 job sheet with these headings: Surface, Grout, Installation date, Cleaning instructions, and Open repairs. These are your own checklist labels, not settings in a booking system. Keep the sheet available for the installer and cleaner.
Installation readiness
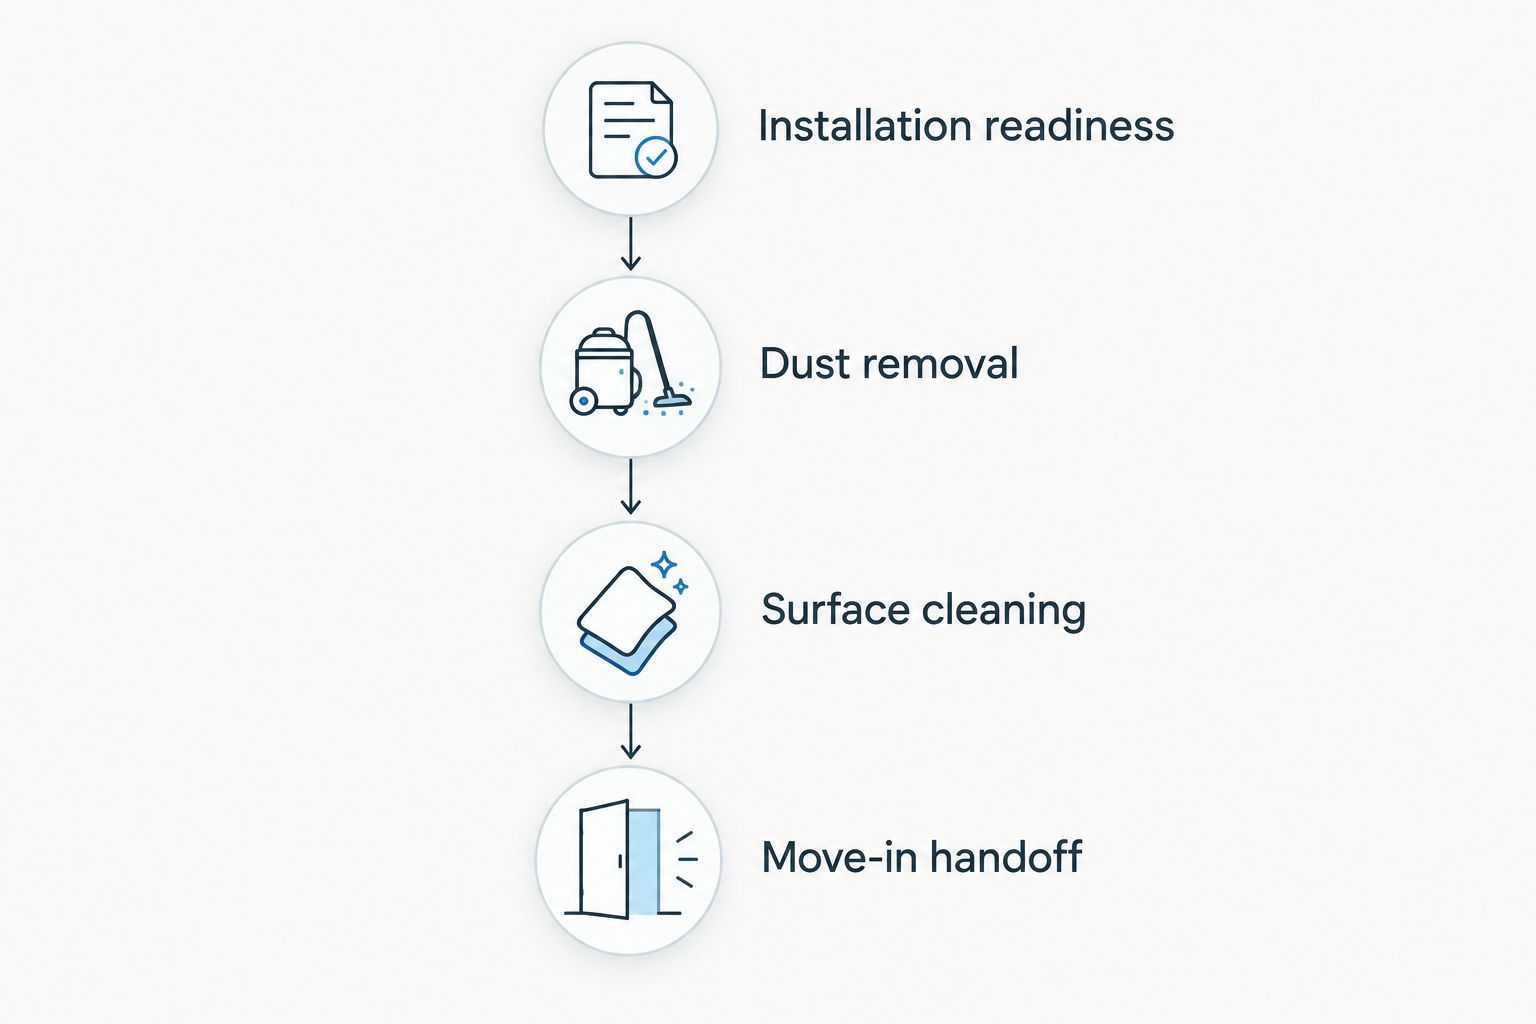
This workflow has 4 stages: installation readiness, dust removal, surface cleaning, and move-in handoff. Complete each stage before starting the next.
- Finish dusty work. Ask the contractor whether tile cutting, sanding, drilling, or cabinet adjustments remain. Schedule the final clean after those tasks. Moving a cleaning appointment is better than paying for the same cleanup twice.
- Confirm curing requirements. Read the grout and adhesive instructions with the installer. Record when the installed materials are ready for the planned cleaning method. Do not replace product directions with a generic waiting period.
- Document visible defects. Photograph loose tiles, chipped edges, missing grout, cracked joints, or uneven areas before cleaning. Ask the installer to assess them. Cleaning does not repair an installation defect.
- Define the cleaning boundary. Specify whether the job includes the kitchen floor, backsplash, grout lines, thresholds, and adjoining tiled rooms. Identify surfaces excluded from the work, including unfinished joints or sensitive trim.
Expected result: You have a defined cleaning area, confirmed material instructions, and a separate list of contractor repairs. Nothing on the repair list gets disguised as a cleaning problem.
For a 2026 remodel handoff, record approvals in the same job sheet. A verbal statement that the floor is ready is harder to check later than a written instruction naming the installed grout and permitted cleaning method.
Dust removal
- Remove debris safely. Pick up packaging and loose offcuts without dragging sharp pieces over the tile. Leave attached mortar, adhesive, or grout deposits alone until the installer identifies the appropriate removal procedure.
- Address dust above the floor. Clean accessible shelves, ledges, cabinet surfaces, and other areas that can drop dust onto the tile. Follow the cabinet and countertop care instructions; the floor cleaner is not automatically suitable elsewhere.
- Capture loose floor dust. Use equipment appropriate for the dust and surface. Do not dry-sweep suspected silica-containing construction dust or use an ordinary household vacuum to handle hazardous construction dust. Ask the contractor to manage it with suitable controls.
- Check edges and transitions. Inspect toe-kicks, thresholds, corners, and accessible spaces around appliances. Remove loose dust without forcing water under cabinets or into unfinished joints.
Expected result: Loose debris is removed before water touches the floor. A clean cloth passed over a small area should not immediately collect a heavy layer of powder.
The order matters more than extra scrubbing. Dust left on shelves falls onto the cleaned floor, while dust left in grout lines turns into a muddy film during wet cleaning. Keep contractors' footwear and tools out of the finished area once this stage is complete.
Surface cleaning
- Classify the residue. Separate ordinary soil from grout haze, paint, adhesive, and damaged grout. If you cannot identify a deposit, stop before choosing a stronger chemical. Tell the installer where it appears and how it feels.
- Test 1 inconspicuous area. Use a product approved for the tile and grout. Follow its dilution, contact, and rinsing instructions. Inspect the test area after it dries before treating the visible floor.
- Clean a manageable section. Apply the compatible cleaner without flooding edges or adjacent materials. Use a suitable non-scratching tool. Do not mix cleaning products or assume extra concentration produces a better result.
- Remove the dirty solution. Collect loosened soil rather than spreading it across the next section. Replace dirty rinse water and cloths as needed. Follow the cleaner's directions for rinsing.
- Inspect after drying. Check for remaining film, altered sheen, grout damage, and slippery residue. Judge the finish when dry; wet tile can hide marks that return as moisture evaporates.
Expected result: The test area and cleaned sections are free of removable soil without visible surface damage. Persistent deposits are identified for separate treatment rather than repeatedly scrubbed.
Match the task to the method
The right choice depends on what remains after dust removal. For more detail, see the guide to tile and grout cleaning methods.
| Approach | Best for | Advantage | Limitation |
|---|---|---|---|
| Routine surface cleaning | Loose soil and removable cleaning film on approved surfaces | Lets you test compatibility before treating the whole floor | Does not repair grout or resolve every bonded deposit |
| Installer-directed haze removal | Residue left by the grouting process | Matches treatment to the grout and tile materials | Requires product-specific instructions; unsuitable chemicals can damage surfaces |
| Professional tile/grout cleaning | A defined cleaning job requiring professional help | Separates the cleaning scope from your household cleanup | Does not replace installation repairs or manufacturer instructions |
| Installer repair | Loose tiles, cracked joints, or missing grout | Addresses the defect itself | Is not a cleaning service and must be coordinated separately |
Choose the least aggressive compatible treatment that addresses the identified residue. Stronger chemistry is not a substitute for knowing what is on the floor.
Move-in handoff
- Complete 2 final checks. First, inspect the dry surface for residue and damage. Second, confirm the manufacturer's requirements for traffic, rugs, and any proposed sealing. A visually clean floor still needs a safe handoff.
- Decide whether sealing applies. Check the grout manufacturer's instructions. Not every grout requires sealing, and sealing is not a way to conceal dirt or haze. Confirm compatibility and timing before applying anything.
- Protect appliance routes. Ask the installer or mover how to protect the tile while appliances return. Use appropriate moving equipment and surface protection. Do not drag a refrigerator across the cleaned floor.
- Return furnishings carefully. Put back mats and movable items only when the relevant drying and curing instructions allow it. Remove dusty temporary protection instead of reusing it over the finished floor.
- Keep the care record. Save the cleaner name, grout information, sealer details if applicable, and unresolved repair notes. Use that record when choosing future maintenance products.
Expected result: The floor is ready for the permitted use, the appliance route is protected, and routine maintenance starts with the correct material instructions.
Call PowerPro Carpet Cleaning to discuss tile/grout cleaning in Manalapan Township or the surrounding service area. Explain that the kitchen has just been remodeled, identify the materials, and ask whether the remaining residue fits the cleaning service before scheduling.
Discuss your kitchen tile cleanup
Share your tile material, grout details, and remaining residue before arranging cleaning.
When the existing tile stays during the remodel
An existing kitchen floor needs a different readiness check from newly installed tile. You still finish dusty work first, but the main questions concern the floor's condition, prior treatments, and construction residue.
- Record the original condition. Use pre-work photographs where available. Separate old stains, worn grout, and existing chips from marks introduced during construction.
- Identify prior treatments. Ask about grout sealers, color treatments, or coatings. Do not assume a stronger cleaner is compatible with an unknown treatment.
- Remove protection carefully. Lift temporary coverings without scattering trapped grit. Follow surface-specific instructions for adhesive residue; do not attack it with a metal scraper.
- Repeat the test-and-inspect sequence. Clean an inconspicuous section, let it dry, and check the result before expanding the job.
Best for: Homeowners keeping an otherwise serviceable tiled floor while replacing cabinets, counters, or appliances. The advantage is a cleaning plan focused on the retained surface. The limitation is that cleaning will not reverse chipped tile or failed grout.
If new grout repairs were made within the old floor, follow the repair material's curing instructions for those areas. An old floor does not make fresh repairs ready sooner.
Troubleshooting
The floor looks cloudy again after drying
Check whether the cloudiness is loose dust, cleaning residue, or grout haze. Test a small area using the approved procedure. If film returns after proper cleaning and rinsing, ask the installer to assess it rather than repeating stronger treatments.
Grout looks darker in patches
Let the surface dry before judging its final appearance. Check for uneven wetting, residual soil, or variations that existed before cleaning. If the difference persists, document it and ask the installer whether the issue concerns the grout itself.
Powder keeps returning to the clean floor
Check ledges, cabinet tops, adjoining rooms, and unfinished contractor work. Correct the source before another wet clean. Do not treat recurring construction dust as proof that the tile needs a harsher chemical.
A tile moves or a grout joint breaks
Stop cleaning the affected area and notify the installer. Avoid trying to stabilize it with sealer or fill it during routine cleanup. The defect needs assessment before the floor returns to normal use.
Cleaner reaches wood trim or adjacent flooring
Stop, remove the liquid promptly, and follow that material's care instructions. Revise the cleaning boundary before continuing. Protect adjoining surfaces without trapping moisture against them.
Customize your workflow
Expand the checklist by surface, not by adding one stronger cleaner for everything. A backsplash, tiled floor, upholstered dining chair, and area rug need separate care decisions. Keep each cleaning scope clear.
For a larger 2026 renovation, use the post-construction cleaning guide for home builders to organize the wider handoff. Kitchen tile cleaning belongs after dust-producing work and before unprotected move-in traffic.
If adjoining carpets or upholstery also need attention, ask about those services when discussing the job. PowerPro Carpet Cleaning offers carpet, upholstery, area rug, tile/grout, and air duct cleaning. Do not assume construction work means every surface or system needs treatment; describe its condition first.
Keep one owner for the handoff checklist. That person confirms contractor completion, cleaning access, remaining repairs, and the permitted return of furnishings. Separate appointments still need a shared sequence.
FAQ
When should I schedule tile and grout cleaning after kitchen remodel work?
Schedule final cleaning after dust-producing work is complete and the installed materials meet their cleaning requirements. Confirm the grout and adhesive instructions with the installer before setting the date.
Can I mop newly grouted kitchen tile right away?
Do not mop newly grouted tile until the grout manufacturer's instructions permit it. A dry-looking surface does not confirm that the grout is ready for wet cleaning.
What's the best way to remove grout haze from kitchen tile?
Use a haze-removal procedure matched to the tile material and grout product. Ask the installer to identify the residue and approved treatment; acidic products are unsuitable for acid-sensitive stone.
Does professional tile cleaning fix cracked grout?
Professional tile cleaning does not repair cracked grout or loose tiles. Ask the installer to assess those defects separately before intensive cleaning.
Should I seal the grout before moving back into my kitchen?
Seal grout only when the grout manufacturer's instructions call for it and the surface meets the application requirements. Do not seal over unresolved haze, dirt, or installation defects.
Who handles professional kitchen tile cleaning near Manalapan Township?
PowerPro Carpet Cleaning provides tile/grout cleaning in Manalapan Township and surrounding Central and North New Jersey counties. Describe the tile, grout, and post-remodel residue when discussing the cleaning scope.
What should I ask a tile cleaner before my 2026 move-in?
Ask whether the planned method suits your tile and grout, what preparation is required, and which residues are outside the cleaning scope. Also confirm how cleaning will be coordinated with unfinished contractor work.
One last thing
Inspect the floor dry before calling the remodel finished. Water can temporarily hide haze and surface differences. Keep a clean, dry test section as your reference while checking the remaining kitchen, and photograph unresolved marks before appliances cover them. That simple handoff step gives the installer and cleaner a clear problem to address instead of a general complaint that the floor still looks dirty.